This guide will help your organization become acquainted with Dock's platform quickly and easily. We cover how to set up your account details and parking lot features so you can start using our technology to its fullest potential!
Step 1: Setup a Stripe Connect Account
Dock's Welcome email contains a Stripe onboarding link. Please click this link, follow the instructions and complete this step as soon as possible. A connect account is required in order to activate your parking lots.
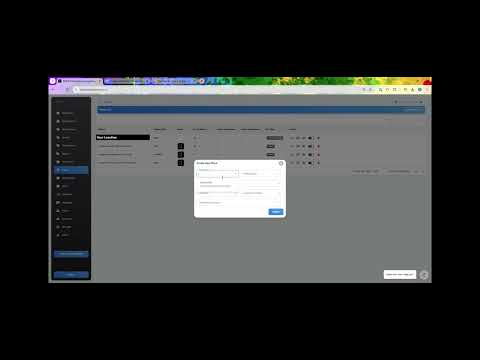
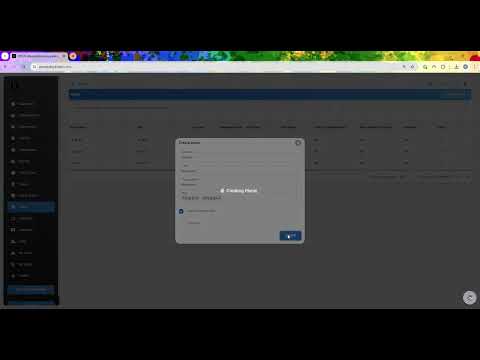
Step 2: Create Location(s)
Navigate to the "Places" tab and click "Add New Place" in the upper right hand corner. Then fill out the simple form and press "CREATE". Your first location with Dock is now created!🎉
Step 3: Create or Assign QR Code
After creating the locations, it's time to assign them to a QR code. The Dock system allows you to either generate a QR code for the location directly through the platform or link the Dock location to an already existing dynamic QR code under your control.
If you are assigning the Dock location to an existing QR code, and that location is currently operating, we suggest assigning the QR code after completion of this quick start guide.
Step 4: Check Pricing Tier
Navigate to Pricing Tier and confirm all revenue settings are correct, to include: Tax, Service Fee and Merchant Fee settings.
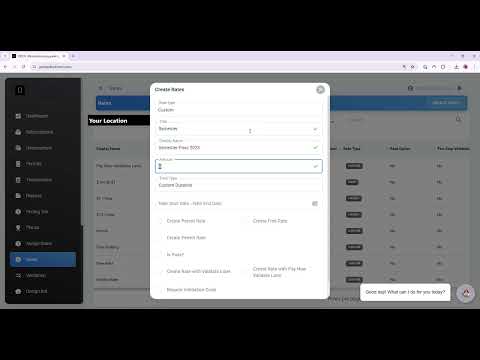
Step 5: Create Rates
You are now ready to create the Rates for your new location(s). Within the Dock platform, Rates are first created within the "RATES" tab before they are made live in the "Assign Rates" tab. Navigate to the "Rates" tab and click "CREATE RATES" to begin creating your location(s) rates.
📺 Hourly, Daily, Overnight or All Day Rates:
📺 Custom Rates:
📺 Custom Duration Custom Rates:
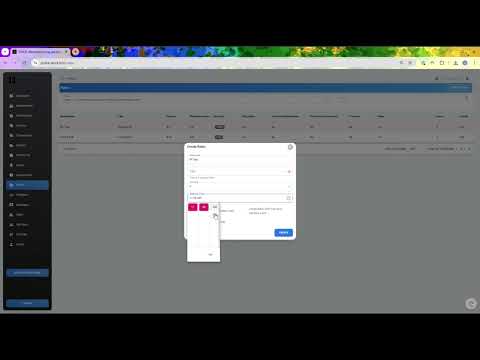
📺 Validation Scenarios:
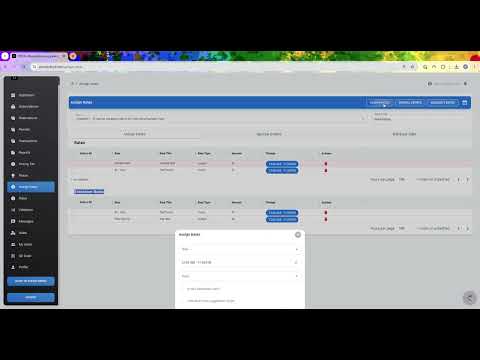
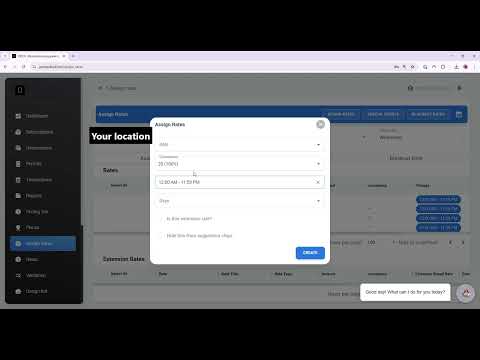
Step 6: Assign Rates
Once rates are created, they then need to be made live via your "Assign Rates" tab. Navigate to the "Assign Rates" tab and click "Assign Rates" to begin making your rates live.
📺 Assign Rates Demo:
📺 Occupancy Based Pricing Demo:
✅ Your Location is Now Ready to Go Live!
Other Features Overview
Once you complete the 6 steps listed above, your location will now be ready to go live. There are a number of other features available through the Dock dashboard. You can find explanations and demo videos for these features below:
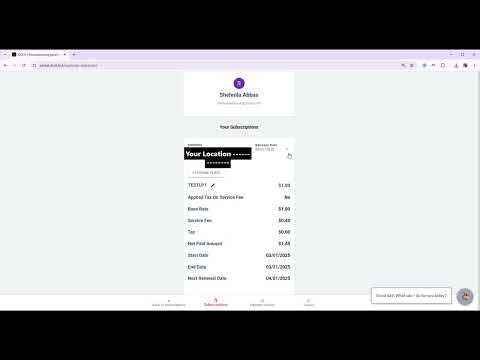
Subscriptions
The Subscriptions dashboard is used to monitor and create new monthly and custom parking subscriptions. This dashboard allows you to manage refunds, track/adjust subscriptions and even create new subscriptions.
📺 Subscription Dashboard Demo:
📺 Creating Monthly Subscriptions:
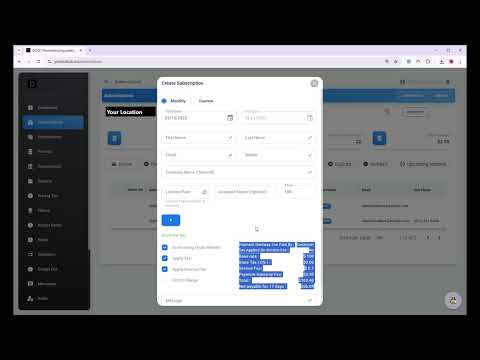
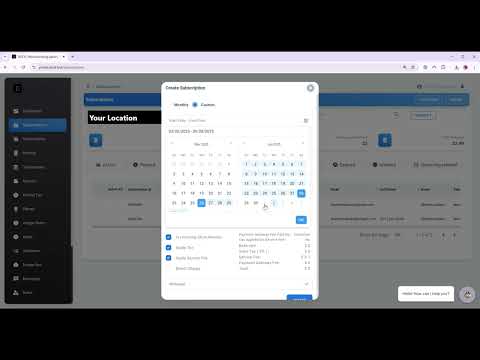
📺 Creating Custom Subscriptions:
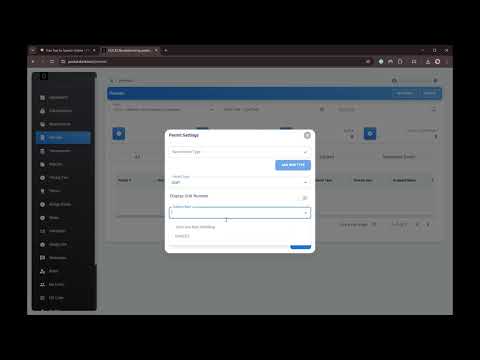
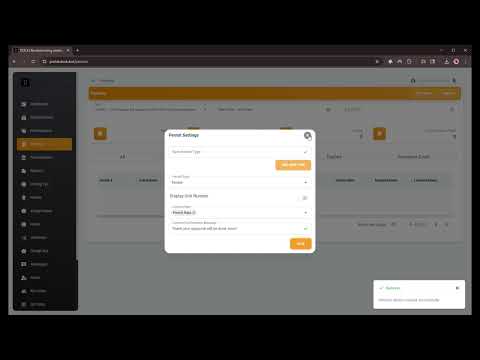
Permits
If you have a list of individuals who should be valid on the location all the time (without payment or validation) then you will add them to the Permit's dashboard. Once added to the permits dashboard, license plates will be excluded from any integrated parking enforcement partner.
Reservations
Monitor transient reservations and issue refunds.
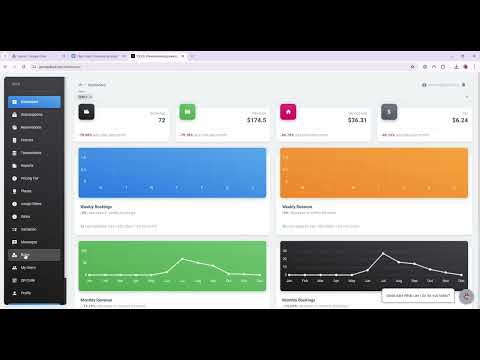
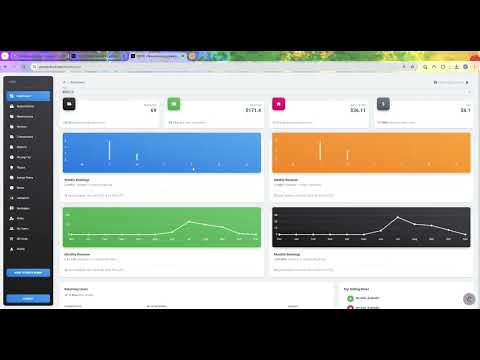
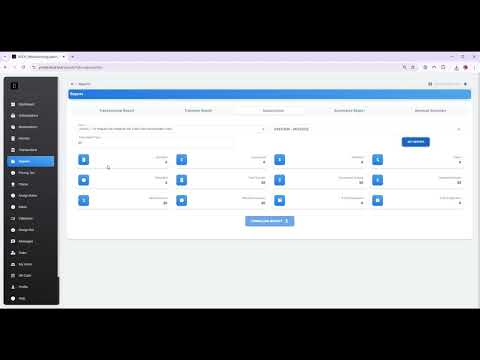
Reports
Get insights on performance with four types of reports.
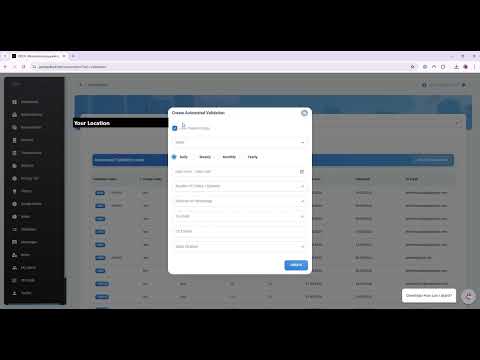
Validation
Create, assign and manage validation codes.
Messages
Customize what your users see through the chatbot.

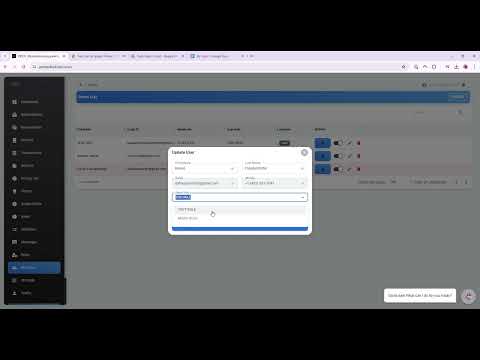
Roles & My Users
Control access levels and invite others to the Dock platform.